

The Honeywell RTH6580WF is a Wi-Fi-enabled smart thermostat designed for efficient temperature control. It offers programmable schedules, smart features, and seamless integration with home networks.
1.1 Overview of the RTH6580WF Model
The Honeywell RTH6580WF is a Wi-Fi-enabled smart thermostat designed for efficient temperature control. It features programmable schedules, smart home integration, and a user-friendly interface. This model is preprogrammed and ready to use once installed and registered. With its advanced features, it simplifies heating and cooling management, ensuring comfort and energy efficiency. The RTH6580WF is compatible with various HVAC systems and supports remote access via the Honeywell Home app. Its sleek design and intuitive controls make it a convenient upgrade for modern homes.
1.2 Importance of the Installation Manual
The installation manual for the Honeywell RTH6580WF is essential for ensuring a smooth and correct setup. It provides step-by-step instructions, wiring diagrams, and compatibility checks to avoid installation errors. The manual also highlights necessary tools, such as a Phillips screwdriver, and additional materials required for installation. By following the guide, users can prevent system malfunctions and ensure optimal thermostat performance. It serves as a comprehensive resource for both DIY enthusiasts and professionals, guaranteeing safe and efficient installation. Proper use of the manual minimizes risks and maximizes the thermostat’s functionality.
System Requirements and Compatibility
The Honeywell RTH6580WF requires a 24 VAC common terminal for proper operation. Ensure your HVAC system is compatible before installation. Refer to the manual for details.
2.1 Checking System Compatibility
Before installation, ensure your HVAC system is compatible with the Honeywell RTH6580WF. Verify that your system has a 24 VAC common terminal, essential for proper operation. Consult your system manual or contact the manufacturer to confirm the correct terminal. For additional guidance, view the Alternate Wiring videos available at wifithermostat.com. Ensure your heating and cooling system supports the thermostat’s advanced features to optimize performance and efficiency. Proper compatibility ensures seamless functionality and avoids potential installation issues.
2.2 Understanding the 24 VAC Common Terminal
The 24 VAC common terminal is crucial for the Honeywell RTH6580WF thermostat’s operation. It provides the necessary power for the thermostat to function correctly. Ensure your HVAC system has this terminal, as it is essential for connecting the thermostat. Refer to your system manual or contact the manufacturer to identify the correct terminal. Incorrect wiring can lead to malfunctions or damage. Always follow the installation manual’s guidelines to ensure proper setup and avoid potential electrical issues. This step is vital for safe and efficient installation.

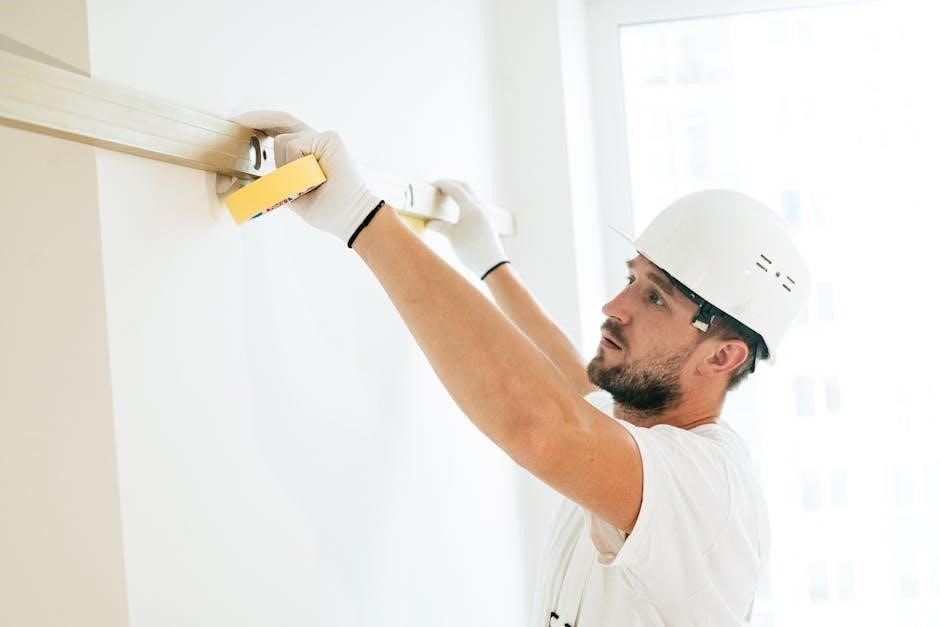
Tools and Materials Needed
To install the Honeywell RTH6580WF, you’ll need a No. 2 Phillips screwdriver and a small pocket screwdriver. Additional materials may be required for specific setups.
3.1 List of Required Tools
To successfully install your Honeywell RTH6580WF thermostat, you will need the following tools:
- No. 2 Phillips screwdriver
- Small pocket screwdriver
These tools are essential for removing the old thermostat and securely mounting the new one. Ensure you have them ready before starting the installation process to avoid delays. Additional materials may be required depending on your specific setup or wiring configuration. Always refer to the manual for detailed instructions on tool usage and safety precautions. Proper tools ensure a safe and professional installation.
3.2 Additional Materials for Installation
Beyond the essential tools, you may need additional materials to complete the installation:
- Wall anchors
- Jumper wires
- Electrical tape
These materials help ensure proper installation, especially if your system requires extra support or wiring adjustments. Wall anchors prevent the thermostat from loosening over time, while jumper wires and electrical tape can assist with specific wiring configurations. Having these on hand can prevent delays and ensure a secure, professional installation. Prepare them in advance to streamline the process.
Pre-Installation Setup
Ensure your system is ready for installation by preparing your Wi-Fi network and registering your thermostat. Power off your HVAC system before starting work.
4.1 Preparing Your Home Wi-Fi Network
Ensure your Wi-Fi network is functioning properly and determine your network name and password. Verify that your router supports 2.4 GHz frequency, as the RTH6580WF requires it. Restart your router to ensure stability and check for any firmware updates. Ensure your router’s 2.4 GHz network is enabled and accessible. Move any obstacles that may obstruct the signal and test the Wi-Fi strength in the area where the thermostat will be installed. Secure your network with a strong password and ensure it is ready for the thermostat’s connection during installation.
4.2 Registering Your Thermostat
Create a Honeywell Home account to register your thermostat. Visit the Honeywell website or use the app to access the registration page. Enter the thermostat’s MAC ID, located on the back or packaging, and follow the prompts. Provide a valid email address for account verification. Once registered, your thermostat will be linked to your account, enabling Wi-Fi connectivity and smart features. Registration is essential for remote access and software updates, ensuring optimal performance and functionality of your RTH6580WF thermostat.

Installation Steps
Turn off power, remove old thermostat, prepare wiring, mount new device, connect wires, restore power, and test functionality to ensure proper installation.
5.1 Mounting the Thermostat
Mounting the Honeywell RTH6580WF thermostat involves several key steps. First, ensure the power to your HVAC system is turned off at the circuit breaker to prevent any electrical hazards; Next, remove the existing thermostat carefully, taking note of the wiring configuration to avoid damage. Prepare the wall by peeling the adhesive backing off the included mounting bracket and securing it firmly, ensuring it is level for proper installation. Once the bracket is in place, connect the wires to the corresponding terminals on the new thermostat, matching the color codes as indicated in the manual. Finally, snap the thermostat into the mounting bracket and restore power to test its functionality. Proper installation ensures safe and efficient operation of your new smart thermostat.
5.2 Connecting the Wiring
Connecting the wiring for the Honeywell RTH6580WF thermostat requires careful attention to detail. Start by identifying the wires from your HVAC system, ensuring they match the terminal labels (e.g., R, W, Y, G, C, etc.). Connect each wire to the corresponding terminal on the thermostat, securing them firmly with the terminal screws. Double-check the connections to avoid cross-wiring, which could damage the system. If your system lacks a C (common) wire, you may need to use the included jumper wire or a 24VAC adapter for proper operation. Always refer to the wiring diagram in the manual for guidance.
5.3 Securing the Thermostat
Once the wiring is connected, secure the Honeywell RTH6580WF thermostat to the wall plate using the provided screws. Ensure the thermostat is level and firmly attached to prevent any movement or loose connections. Tighten the screws gently but securely to avoid damaging the device. If necessary, use the included wall anchors for added stability. Double-check that all wires are neatly organized and not pinched by the thermostat or wall plate. Proper securing ensures reliable operation and prevents potential malfunctions. Refer to the manual for specific torque recommendations to avoid over-tightening.

Wi-Fi Setup and Configuration
Connect your Honeywell RTH6580WF to your home Wi-Fi network for smart operation. Ensure a stable internet connection and configure settings for optimal performance and security.
6.1 Connecting to Your Home Wi-Fi
To connect your Honeywell RTH6580WF to your home Wi-Fi, power on the thermostat and navigate to the Wi-Fi settings menu. Select your network from the list, ensuring it is a 2.4 GHz band. Enter your Wi-Fi password using the touchscreen interface. The thermostat will attempt to connect; wait for confirmation. If successful, the screen will display a connected status. If issues arise, restart the thermostat and retry. Ensure your router is functioning properly and within range for a stable connection.
6.2 Configuring Thermostat Settings
After connecting to Wi-Fi, configure your Honeywell RTH6580WF by setting temperature ranges, scheduling, and preferences. Navigate to the menu and select “Settings” to adjust temperature limits, humidity levels, and fan settings. Set up a daily schedule by choosing time intervals and desired temperatures. Enable features like geofencing or smart alerts for energy efficiency. Customize the display brightness and backlight timing. Ensure all settings align with your comfort and energy-saving goals. Save changes to apply them permanently.

Advanced Features and Customization
Explore programmable schedules, smart home integrations, and customizable temperature settings. Adjust fan operation, humidity control, and energy usage reports for enhanced comfort and efficiency.
7.1 Understanding Programmable Schedules
Programmable schedules allow you to set temperature adjustments for different times of the day. Create custom settings for wake, leave, return, and sleep periods. This feature optimizes comfort and energy efficiency by automatically adjusting temperatures when you’re not home or when you’re sleeping. Use the thermostat’s interface to program up to four periods per day, ensuring consistent comfort while reducing energy waste. Regularly review and update your schedules to adapt to seasonal changes or lifestyle adjustments for maximum efficiency.
7.2 Customizing Temperature Settings
Customizing temperature settings on the RTH6580WF allows precise control over your home’s comfort. Set specific temperatures for different times of the day or manually override schedules as needed. The thermostat’s hold function lets you lock in a temperature temporarily, while permanent adjustments can be made through the menu. This feature ensures energy efficiency by only heating or cooling when necessary. Use the touchscreen interface to easily adjust settings, and consider pairing with an optional remote sensor for room-specific temperature control. Regular adjustments can optimize both comfort and energy savings.
7.3 Exploring Smart Features
The RTH6580WF offers advanced smart features to enhance convenience and efficiency. Use the Honeywell Home app for remote temperature control and scheduling. Geofencing automatically adjusts settings based on your location. Smart alerts notify you of extreme temperatures or system issues. Voice control integration with smart speakers like Amazon Alexa or Google Assistant allows hands-free adjustments. Energy usage reports help you optimize consumption. These features make managing your home’s climate intuitive and energy-efficient, ensuring comfort while reducing waste. Explore these options to maximize your thermostat’s capabilities and enjoy a smarter home experience.
Troubleshooting Common Issues
Troubleshooting common issues with the RTH6580WF involves checking Wi-Fi connectivity, verifying wiring connections, and ensuring proper power supply. Refer to the manual for detailed solutions and guidelines to resolve malfunctions effectively.
8.1 Resolving Wi-Fi Connectivity Problems
Troubleshooting Wi-Fi issues with the RTH6580WF starts with ensuring your network is operational; Restart your router and thermostat to reset connections. Verify the Wi-Fi password is correctly entered and that the thermostat is within range of your router. Check for firmware updates, as outdated software can cause connectivity problems. If issues persist, consult the installation manual for advanced troubleshooting steps, such as resetting the thermostat or performing a factory reset. Ensure a stable internet connection for optimal smart functionality.
8.2 Addressing Installation Errors
Common installation errors include incorrect wiring connections or improper mounting. Ensure all wires are securely attached to the correct terminals, and verify the 24VAC common wire is properly connected. Check that the thermostat is level and the backplate is securely fastened to the wall. If the display is blank, ensure power is supplied to the system. Consult the manual for wiring diagrams and troubleshooting guides. Correcting these issues ensures proper functionality and avoids future malfunctions. Always follow safety precautions when handling electrical systems.
8.3 Fixing Thermostat Malfunctions
If the thermostat malfunctions, start by checking the power supply and ensuring all wiring connections are secure. A blank or unresponsive screen may indicate a power issue or faulty display. Reset the thermostat by turning off power at the circuit breaker for 30 seconds, then restoring it. For temperature inaccuracies, recalibrate the thermostat or check the sensor accuracy. Regularly clean the device to prevent dust buildup, which can cause errors. If issues persist, refer to the manual or contact Honeywell support for further assistance.

Maintenance and Upkeep
Regularly clean the thermostat’s display and sensors to ensure accuracy. Check for software updates to maintain functionality. Inspect wiring for secure connections to prevent issues.
9.1 Cleaning the Thermostat
Regular cleaning ensures optimal performance and accuracy. Use a soft, dry cloth to wipe the display and exterior. Avoid harsh chemicals or abrasive materials. For stubborn marks, lightly dampen the cloth with water. Gently clean the vents and sensors to remove dust or debris. Avoid liquids entering the unit. Clean the thermostat every few months to maintain efficiency. This prevents dust buildup and ensures precise temperature control. Regular maintenance helps extend the device’s lifespan and reliability.
9.2 Updating Software
Regular software updates are crucial for optimal performance and security. To update your Honeywell RTH6580WF thermostat, ensure it is connected to Wi-Fi. Open the Honeywell Home app, select your thermostat, and check for updates. Follow on-screen instructions to download and install the latest version. The thermostat may restart during the process. Do not interrupt the update to avoid potential issues. Updates typically take a few minutes and improve functionality, add features, and enhance system security.

Energy-Saving Tips
Adjust temperature settings when away or sleeping. Use programmable schedules and smart features to optimize energy use and reduce utility bills effectively year-round.
10.1 Optimizing Temperature Settings
Optimizing temperature settings is key to maximizing energy efficiency. Lower the temperature in winter and raise it in summer when the house is unoccupied. Set your thermostat to 68°F in winter and 78°F in summer for optimal savings. Use the programmable schedule feature to automate these changes. The Honeywell RTH6580WF also offers smart recovery, which learns your system’s operation to maintain comfort while saving energy. Adjusting humidity settings can further enhance efficiency without extreme temperature fluctuations, ensuring both comfort and energy savings year-round.
10.2 Utilizing Smart Features for Efficiency
The Honeywell RTH6580WF offers advanced smart features to enhance energy efficiency. Enable geofencing to adjust temperatures based on your location, ensuring your system runs only when needed. Use smart scheduling to create customized temperature profiles for different times of the day. Additionally, the energy usage report provides insights into your consumption patterns, helping you identify areas for improvement. These features work seamlessly together to optimize your HVAC system’s performance, reducing energy waste while maintaining comfort and convenience. Regular updates ensure your thermostat remains efficient and up-to-date with the latest smart home technologies.
Completing the RTH6580WF installation successfully enhances your home’s comfort and efficiency. Ensure all steps are followed carefully for optimal performance and enjoy the benefits of smart temperature control.
11.1 Final Checks and Verification
After completing the installation, perform a final check to ensure everything is functioning correctly. Verify that the thermostat is securely mounted and all wires are properly connected. Turn on the power and check the display for proper operation. Test the Wi-Fi connection to confirm it is connected to your network. Review the installation manual to ensure all steps were followed accurately. This final verification ensures safe and efficient operation of your Honeywell RTH6580WF thermostat.
11.2 Enjoying Your Smart Thermostat
Congratulations! Your Honeywell RTH6580WF is now installed and ready to enhance your home comfort. Explore its smart features, such as programmable schedules and remote access, to optimize energy use and convenience. Adjust settings effortlessly via the touchscreen or app, ensuring your home stays cozy while saving energy. Customize temperature preferences to suit your lifestyle and enjoy the seamless integration with your smart home system. With proper setup, you’ll experience improved efficiency, comfort, and control over your heating and cooling needs.